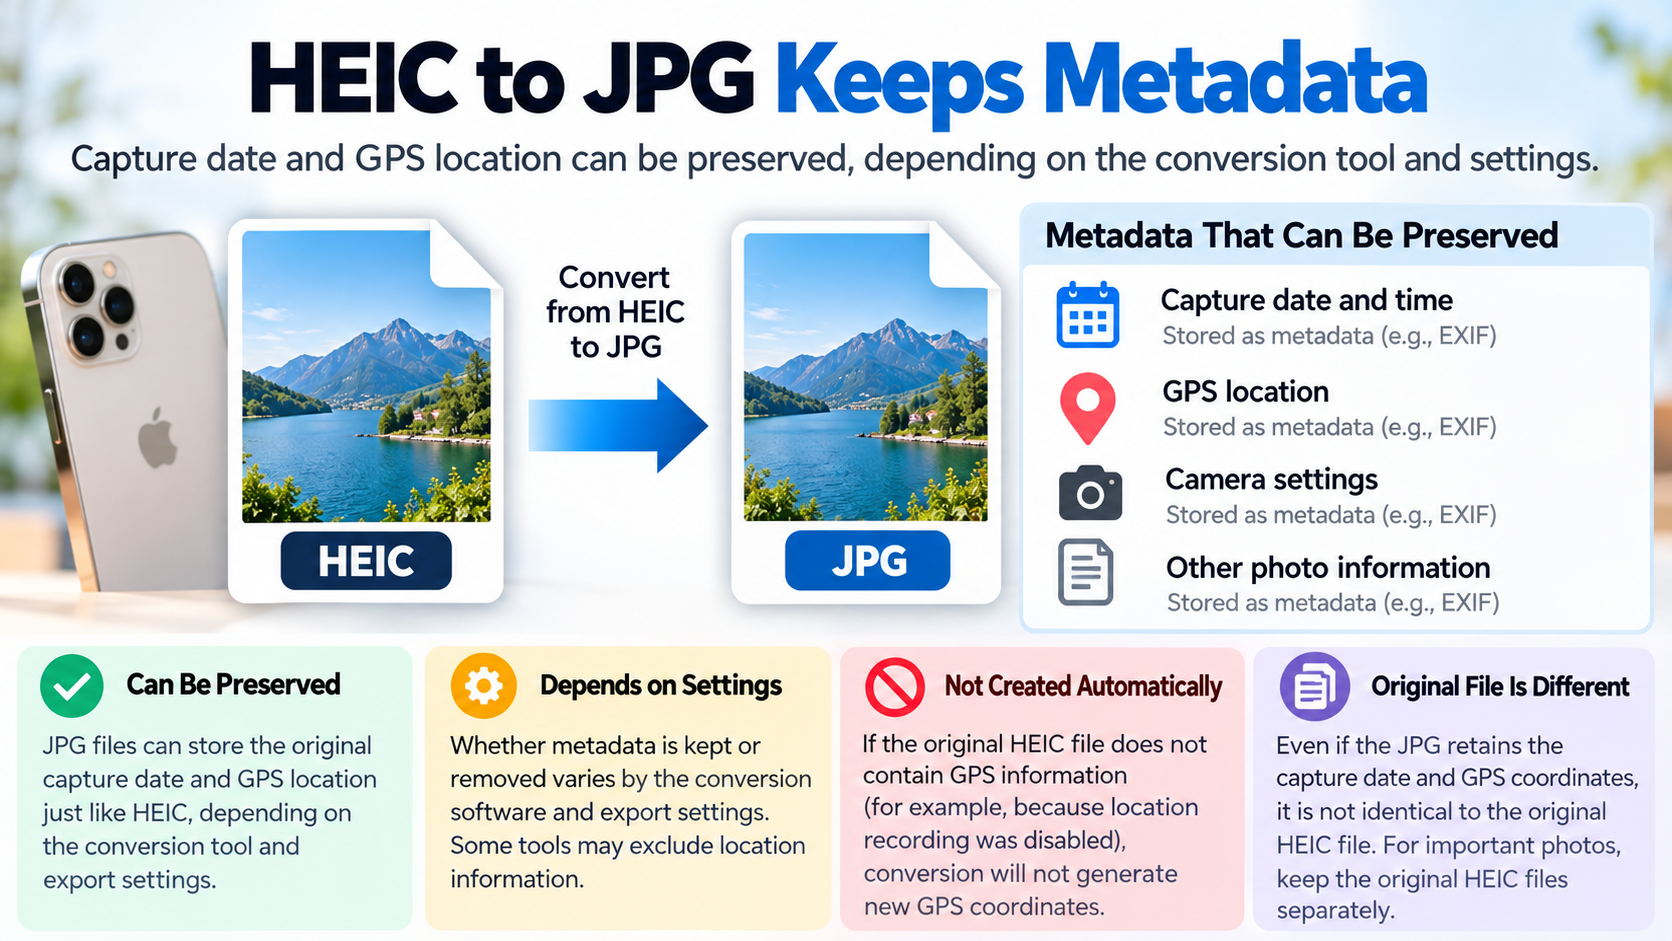

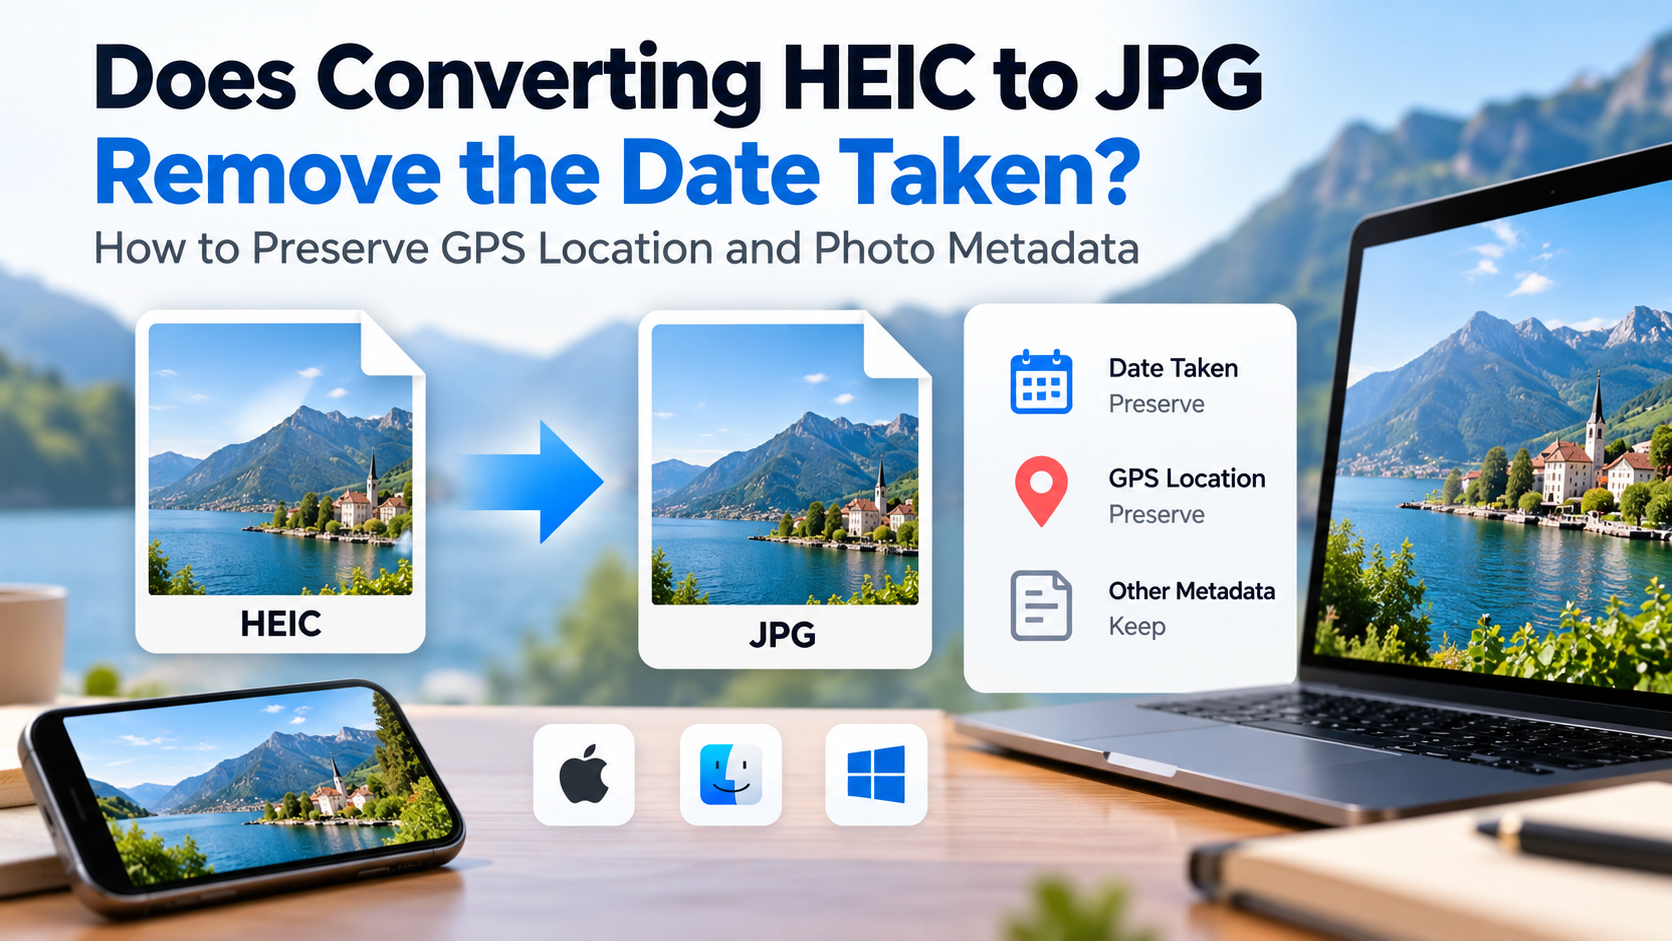
Converting an HEIC photo taken on an iPhone to JPG does not necessarily remove its original capture date or GPS location information. JPG files can also store the time and location of a photograph, but whether that information is preserved or excluded depends on the conversion software and export settings. For important photos, keep the original HEIC files separately and verify the capture information in the converted JPG files.
In particular, the date a photo was converted and the date it was actually taken may be different. Do not assume that the original information has disappeared simply because of the date displayed in File Explorer.
1. What Happens to the Capture Date and Location When Converting HEIC to JPG?
When converting HEIC to JPG, photo capture information is managed separately as metadata. Metadata refers to information about a photograph that is not visible in the image itself but can be stored within the file.
For example, EXIF is a photo metadata format that can contain the capture time, camera settings, and GPS coordinates.
However, not every HEIC file contains all this information. If location recording was disabled when the photo was originally taken, converting the image will not automatically create GPS coordinates that were never recorded.
| Item to Check | Status After JPG Conversion | Important Consideration |
|---|---|---|
| Capture date and time | Can be preserved | Check the EXIF capture timestamp |
| GPS location | Can be preserved | Check location exclusion settings |
| Camera information | Can be preserved | Results vary by conversion software |
| File creation date | May change | Distinguish it from the actual capture time |
| Image quality | May change | Check JPEG quality and image size settings |
| Original file | Must be preserved separately | Do not replace the original with the converted file |
The important distinction is that preserving capture metadata and preserving the original file are two different things.
Even if the JPG retains the original capture date and GPS coordinates, it is not identical to the original HEIC file.
2. If the JPG File Creation Date Changes to Today, Has the Original Capture Date Been Lost?
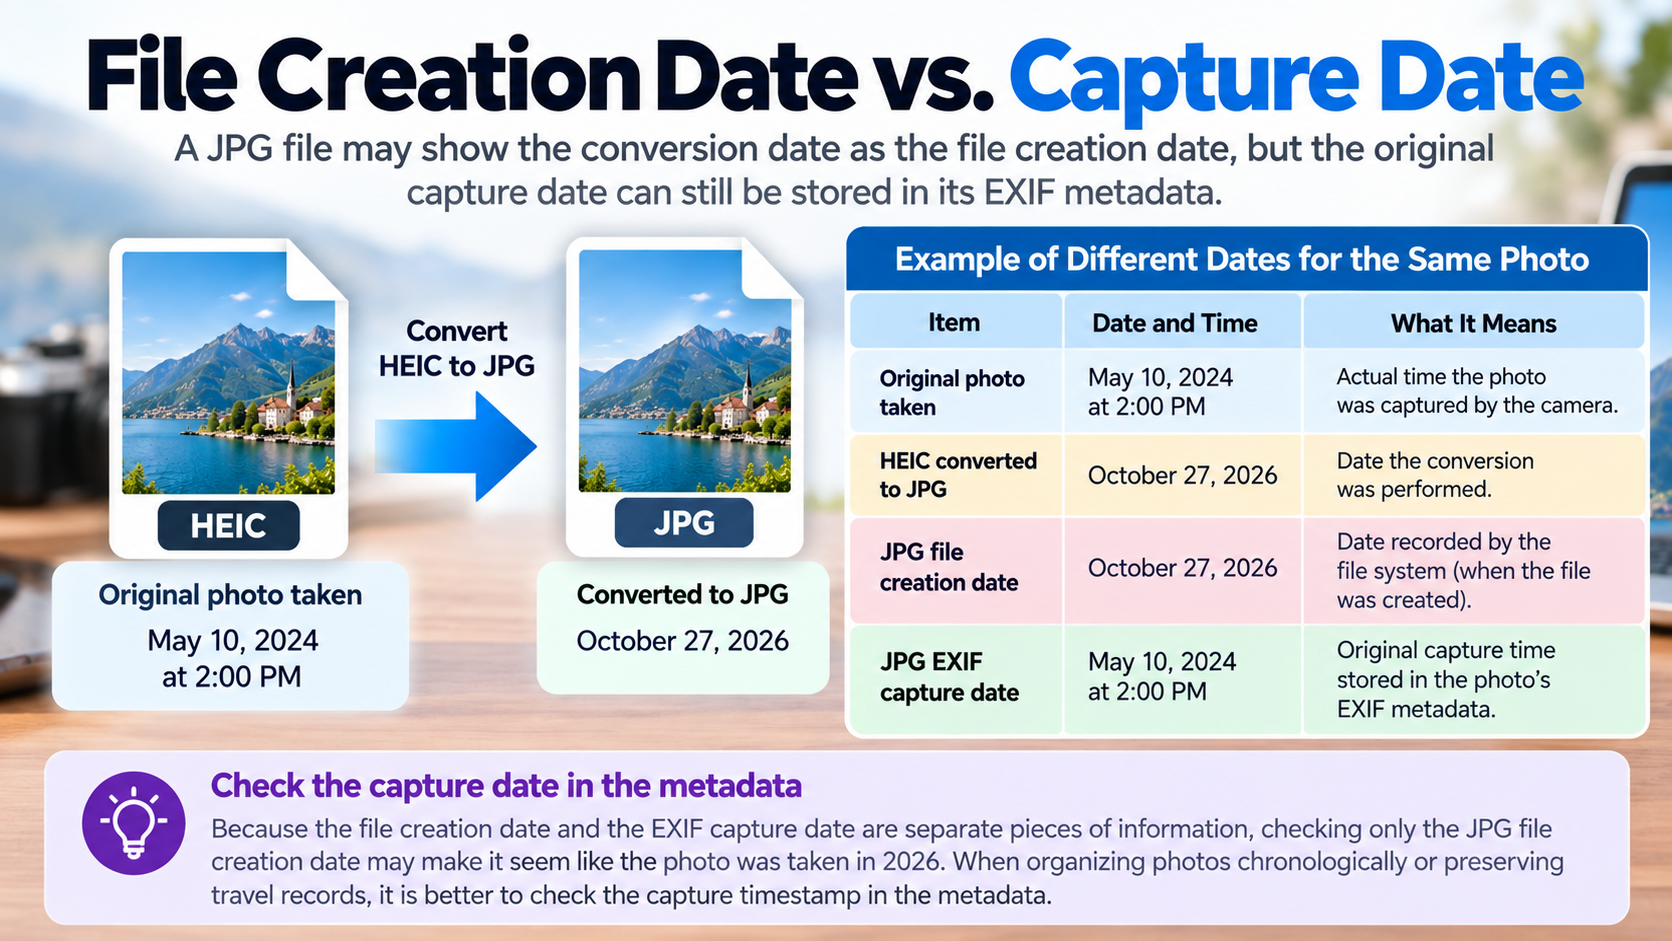
Even if a JPG file displays its conversion date as the file creation date, the actual capture date may still be stored in its EXIF metadata. This is because the date recorded by the file system and the capture date recorded by the camera are separate pieces of information.
Consider the following example:
Original photo taken: May 10, 2024, at 2:00 PM
HEIC converted to JPG: October 27, 2026
JPG file creation date: October 27, 2026
JPG EXIF capture date: May 10, 2024, at 2:00 PM
This is a hypothetical example illustrating how different dates can be recorded for the same photograph.
In this situation, checking only the JPG file creation date might make it appear that the photo was created in 2026. However, its EXIF metadata may still contain the actual capture time from 2024.
Therefore, when organizing photos chronologically or preserving travel records, it is generally better to check the capture timestamp in the metadata rather than relying only on the file creation date.
3. Settings to Check When Sharing HEIC Photos as JPG on an iPhone
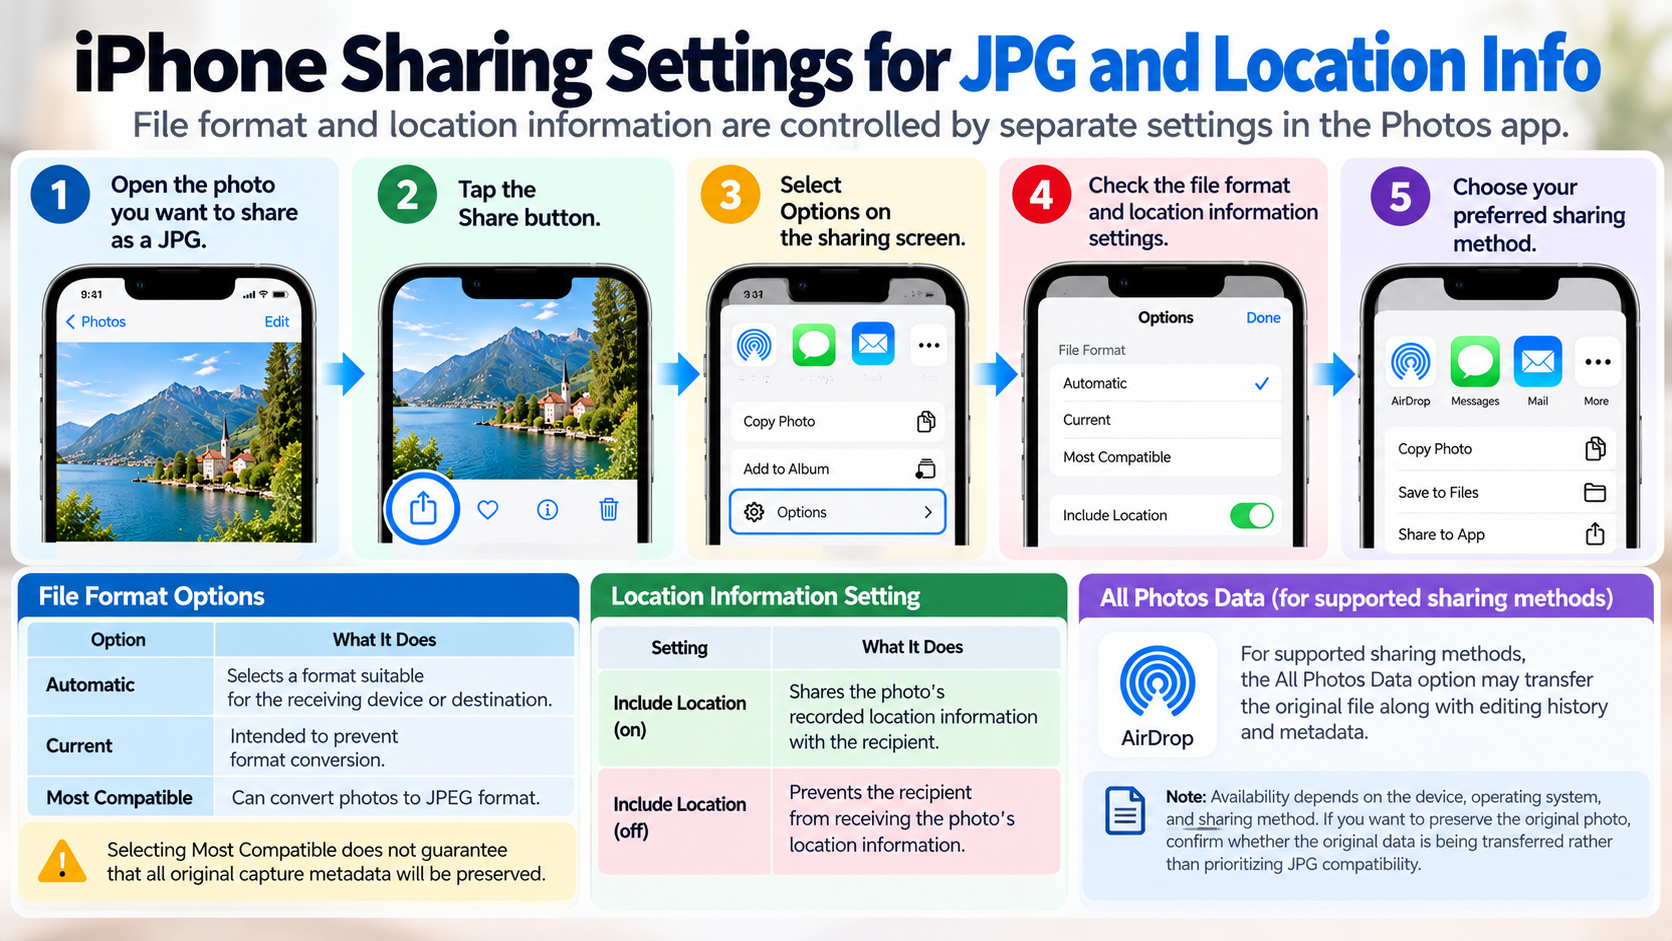
The iPhone Photos app allows you to adjust both the file format and the information included when sharing photos. Converting an image to JPG and including its location information are controlled by separate settings.
Follow these steps in the Photos app:
1. Open the photo you want to share as a JPG.
2. Tap the Share button.
3. Select Options on the sharing screen.
4. Check the file format and location information settings.
5. Choose your preferred sharing method.
Depending on the available options, the file format settings may include Automatic, Current, and Most Compatible.
Automatic selects a format suitable for the receiving device or destination. Current is intended to prevent format conversion. Most Compatible is an option that can convert photos to JPEG format.
Importantly, selecting Most Compatible does not guarantee that all original capture metadata will be preserved.
You can also disable location sharing in the sharing options to prevent the recipient from receiving the photo's recorded location information.
For supported sharing methods, including AirDrop, the All Photos Data option may allow you to transfer the original file along with editing history and metadata. However, availability depends on the device, operating system, and sharing method.
If your goal is to preserve the original photo, it is more important to confirm whether the original data is being transferred than to prioritize JPG compatibility.
4. How to Convert HEIC to JPG on a Mac While Preserving the Original
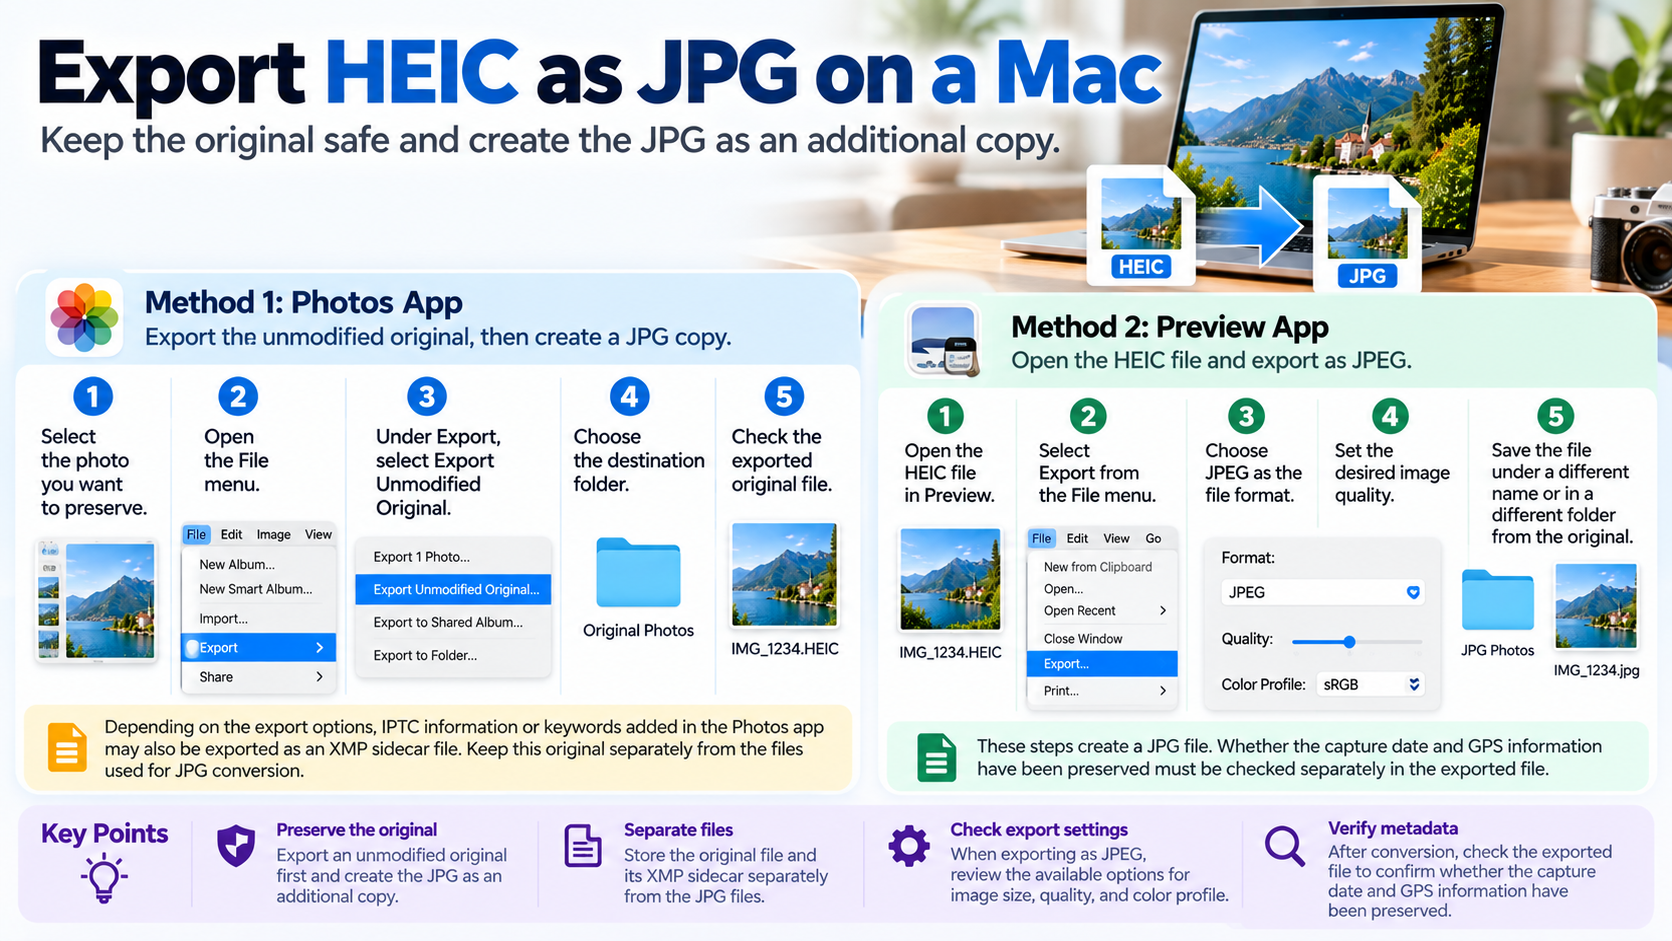
On a Mac, you can export HEIC photos as JPEG files using the Photos app or Preview. If preserving the original is important, a suitable approach is to export an unmodified original first and create the JPG as an additional copy.
Export the Original HEIC File from the Photos App
The Photos app on a Mac provides a feature for exporting original files without modifying their format.
1. Select the photo you want to preserve in the Photos app.
2. Open the File menu.
3. Under Export, select Export Unmodified Original.
4. Choose the destination folder.
5. Check the exported original file.
Depending on the export options, IPTC information or keywords added separately in the Photos app may also be exported as an XMP sidecar file.
It is advisable to store this original separately from the files used for JPG conversion.
Create a Converted JPG Copy
After selecting a photo in the Photos app, you can use the export options under the File menu to specify JPEG as the output format.
During export, check the available settings for image size, quality, and color profile.
You can also use the Preview app on a Mac:
1. Open the HEIC file in Preview.
2. Select Export from the File menu.
3. Choose JPEG as the file format.
4. Set the desired image quality.
5. Save the file under a different name or in a different folder from the original.
These steps create a JPG file. Whether the capture date and GPS information have been preserved must be checked separately in the exported file after conversion.
5. How to Check the Original Capture Date After Converting HEIC to JPG on Windows
On Windows, you can open the properties of a converted JPG file to inspect its capture information. Rather than checking only whether the image opens correctly, it is important to examine the photo metadata that remains in the file.
In File Explorer, select the JPG file, right-click it, and open Properties.
Under the Details tab, check the available fields for Date taken, camera information, and GPS-related data.
You should distinguish between the following two situations.
The File Creation Date Has Changed
The JPG may have received a new file creation date corresponding to the time it was converted. Check whether a separate Date taken field is still available.
The Date Taken Field Is Missing
This may mean that the converted JPG does not contain a recorded capture date, or that the software you are using does not display that information.
In this situation, first check whether the original HEIC contains the capture date, then examine the metadata preservation options in the conversion software.
The same principle applies to GPS information. Just because GPS details are not displayed in Windows file properties does not mean the original file never contained location information.
6. What Should You Do If GPS Location Information Disappears After JPG Conversion?
If GPS information is missing, first determine whether the original HEIC file contained location data. The appropriate solution depends on whether the original never had GPS coordinates or the information was excluded during conversion.
On an iPhone, open the photo in the Photos app and swipe upward or tap the Info button to check its recorded location.
On a Mac, open the photo in Preview and use the location information feature under the Tools menu. If the feature is unavailable, the file may not contain location information.
If the original contains location data but the JPG does not display it, check the following:
Whether the conversion software offers an option to preserve EXIF or other metadata
Whether location information was excluded during sharing
Whether you converted the original file or a separately saved image
Whether the JPG immediately after conversion is the same file as the JPG downloaded after uploading it to another app
If you have transferred the photo through several apps, it is important to identify the stage at which the information changed.
Comparing the original HEIC directly with the first converted JPG can help avoid unnecessarily converting your entire photo collection again.
7. Is It Safe to Delete the Original HEIC Files and Keep Only JPG Copies?
For photos intended for long-term storage, it is generally better not to delete the original HEIC files simply because the JPG conversion was successful.
HEIC is a format designed for efficient image storage, while JPEG is widely compatible with websites and photo applications.
Both formats have different advantages, but a converted JPG does not necessarily preserve every characteristic of the original file.
In particular, JPEG export results can vary depending on the selected quality and image dimensions.
For irreplaceable photos, such as travel pictures or family photographs, you can organize your files as follows:
| Storage Folder | Contents | Purpose |
|---|---|---|
| Originals | HEIC files | Preserve the original captured files |
| Converted | JPG files | Web uploads and device compatibility |
| Separate Backup | Copies of original files | Protect against file loss |
The purpose of separating these folders is not simply to increase the number of stored files. It is to ensure that you can return to the original if capture metadata is missing from a JPG or another image format is needed later.
8. How to Verify That a Converted JPG Was Saved Correctly
After converting HEIC to JPG, you should check image quality and metadata separately. The fact that a photo displays correctly does not guarantee that its original capture date and location information have been preserved.
The simplest approach is to compare one original HEIC file with one converted JPG file side by side.
1. Check the capture date and location in the original HEIC.
2. Create a JPG without deleting the original.
3. Check the capture date and time in the JPG.
4. If location information is important, compare the GPS data as well.
5. Confirm that the image dimensions and quality are suitable for your intended use.
6. If everything is satisfactory, convert the remaining photos using the same settings.
If you plan to convert hundreds of photos at once, it is advisable to complete this process first.
Checking whether metadata is preserved in a single converted image before starting a batch conversion can reduce the risk of having to process many files again because of incorrect settings.
9. Should You Keep GPS Location Information When Sending Photos to Other People?
It depends on how the photos will be used. Location information can be useful for personal records, but it may be unnecessary for photos shared publicly with an unrestricted audience.
If location services are enabled for the iPhone camera, photos may contain coordinates identifying where they were taken.
When you share a photo containing this information, the recipient may be able to identify the location where it was captured.
It is particularly important to check location metadata before sharing photos taken inside your home or at other private locations.
In the iPhone Photos app, you can disable location information sharing through the options on the sharing screen.
However, if you also want to preserve the original file, it is advisable to distinguish between archival originals and files intended for external sharing.
A practical approach is to retain the necessary capture records in your archived HEIC files while checking whether GPS information is included in JPG copies before sharing them publicly.
The most important part of converting photos from HEIC to JPG is not simply changing the file extension. It is safely preserving the original HEIC files and confirming that the converted JPG files retain the actual capture dates and GPS information in the form you intended.